
HP Scanjet G4010 Driver Download:
Download the latest and official version of drivers for HP Scanjet G4010. This driver package is available for 32 and 64-bit PCs.
Download HP Scanjet G4010 Driver (Here)
Experience industry-leading color accuracy up to 40% better than standard scanners with HP Real Life technologies. Easily bring faded photos back to life and restore lost details with one-touch scanning.
Scanner Drivers:
Download and install HP Scanjet G4010 Drivers to get full functionality from your scanner. This package contains the software needed to scan photos, documents and film. It also enables scanning with the Windows Photo Gallery on Win Vista / Win 7 and the Scanner and Camera Wizard in XP, as well as many 3rd party scanner enabled applications.
Industry leading color accuracy. Get true-to-original colors with world’s first 6-color photo scanning and 4800 x 9600-dpi resolution[1]. Restore faded photographs, remove red eye and enhance details using included software.
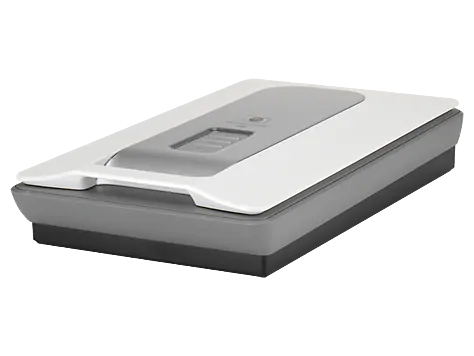
The HP Scanjet G4010 is an inexpensive flatbed scanner that can scan film, photos, documents and other inanimate objects. The scanner’s biggest claim to fame is a unique six-color scanning sensor that uses two different colored lamps to illuminate the object being scanned, in order to capture colors that conventional RGB (red, green, and blue) sensors cannot.
Scanner Software:
Download the latest and official version of drivers for HP Scanjet G4010. This driver package is compatible with Microsoft Windows 32-bit and 64-bit operating systems.
The G4010 is a competent desktop scanner with an impressive list of features. These include built-in transparency scanning for slides and film as well as six-color scans of reflective media. The software also allows you to scan several pictures or frames of movie at the same time, and provides options for stitching the images together or creating a slide show with scanned images.
The software includes tools for adjusting image resolution (up to 19,200 dpi), sharpening, dust and scratch removal, restoring faded color, and other adjustments. You can even adjust a photo’s lighting and focus to bring out details that are difficult to capture in-camera. Four function buttons on the front of the scanner activate various scan functions, and you can customize these through the scanning software’s preferences pane in OS X.
Scanner Manuals:
The HP Scanjet G4010 Photo Scanner manual is a guide that provides information about the scanner and how to use it. It also includes tips and tricks to help you get the most out of your scanner. If you have a problem with your scanner, refer to the troubleshooting section of the manual for advice.
WORLD’S FIRST 6-COLOUR SCANNER:
Get industry leading color accuracy—up to 40% more accurate than other scanners—for true-to-the-original scans. Preserve and restore photos, slides and negatives with a resolution of up to 4800 x 9600 dpi. Reduce blur and red-eye with HP Real Life technologies.1
Scan directly into other software programs if the program is TWAIN compliant. The HP Solution Center will display a list of the compatible TWAIN programs.
To scan to a PDF, place your original face down on the scanner and then press the Scan button. If you want to preview your scanned image, select Show preview from the What are you scanning? dialog box.
FAQ:
The HP Scanjet G4010 can scan slides, negatives and transparencies, including 35 mm film strips. It can also automatically correct pictures and restore faded colors. To do this, you must have the HP Scanning software installed and activated. The HP scanning software saves scanned pictures to the My Scans folder by default. You can change the destination folder.
If you need more control during the scanning process or want to use advanced features, scan from the HP Solution Center. To open HP Solution Center, click the icon on the Windows desktop or the taskbar and then select HP.
Before using the scanner, connect it to a power source and plug it into a surge protector or grounded wall outlet. Also, make sure the transparent materials adapter (TMA) cable is connected to the port on the scanner or to the TMA cable attached to the scanner.